Tuesday, 11 June 2013

Spring growth in the garden and an obsession with water

While not as advanced as previous years because of the very cold spring, the garden is finally getting going and we've been eating some meals produced by it, and eating out in it (when the weather permits).

Almost all the beds are now set out, although I need another 2 tonnes or so of good soil rather urgently to get the sweetcorn, dwarf beans and squash in.

Looking back over the pictures its hard to reconcile the bare waste-ground look we first had...


...with the lush greenness that is there now - well in some beds at least.


So far we've only been eating mesclun and lettuces from the greenhouse, Sunderland Kale, turnip broccoli, purple orache and pea leaves from outside.  But there are plenty more plants getting bigger now and the broad beans and peas are only a few weeks away.

There are now some 26 tomato plants in the greenhouse, and various chilli and aubergine plants as well. I've got the usual Sungold F1 variety that I've grown for the last few year growing round the edges in grownbags with the aubergines and chillis in pots in front of them. In the middle of the greenhouse I've put large potato growsacks with up to 5 tomatoes in each.


The tomatoes in potato grow sacks in the middle have almost 10 foot above them and rather than stake some of them as I would normally do I've coiled twine up in the eaves and am allowing it to hang down then winding the tomatoes around that. the theory is that once the tomatoes are growing up in the eaves of the greenhouse, the lower parts of their stems will have finished fruiting, so the coiled string is let out a bit at a time, slowly lowering the plant a bit at a time allowing them to continue to grow upwards.  In theory at the end of the season the tomato plant should be much taller than the height of the greenhouse, but much of its growth will be coiled at ground level. That's the theory.

The aim with all these tomato plants is to can/bottle/freeze vast quantities so that we are relatively self sufficient in tomatoes through the winter.  Of course producing that amount of tomatoes requires serious amounts of water.

We moved here with 4 water butts - about 700 -800 litres capacity in total. We also acquired two metal water storers that were already plumbed into the greenhouse - so about another 500 litres capacity there. However moving in February meant emptying the water butts at the old house of all the water I had carefully stored and it was actually quite dry for significant periods of the spring and I refuse to pay for water to water the plants when its coming down for free and just needs collecting. I started getting worried a few weeks ago when all the butts were rapidly emptying from the little I had managed to collect and the weather was beginning to warm up - and once the first really good downpour got going, rushed out and bought a further 3 butts (~600 litres). 

I then amused the family, and the neighbours no doubt, by rushing around between the various water butts  ensuring that water from the two butts filling rapidly from the house drainpipes was transferred down to the water butts at the bottom of the garden where it was most needed - most of this was down with hosepipe and gravity, but I also moved about 300 litres with watering cans and got very wet in the process. What is scary is how fast the butts are emptying now the plants are really getting growing and with the hot sun we've had recently. I'm certainly water obsessed and spend far too much time planning how I'll get the most water possible down the garden into the butts down there once we have the next heavy downpour.

Monday, 10 June 2013

Reducing waste in the kitchen - using up the ends of the bread

Bringing two families together means there are rather a lot of us and we get through a lot of bread in a week - sadly very rarely made by me at the moment.  The ends of the loaf always get left  - occasionally they are cut thick enough that we are able to slice it thinner, but usually not. So what to do with the leftovers, apart from fill up local ducks and our chickens, so that we reduce the waste?

I love gnocchi and vaguely remembered a recipe for gnocchi made from breadcrumbs so got searching for ideas. I've done my usual adaptation to suit what ingredients I have available and what I think feels right - and to take advantage of all the very abundant stinging nettles at this time of year!

Nettle and breadcrumb gnocchi
115g nettle tops
340g bread - ends of old loaves are best and use up what would might be wasted.
1 egg
Pinch of freshly grated nutmeg
Seasoning

Drop the nettle tops into boiling water and leave for about a minute then drain but don't squeeze out all the water.

Pop the bread into a food processor and start to turn it to breadcrumbs - it really does need to be very fine breadcrumbs to allow the mix to hold together - the first time I made breadcrumb gnocchi I didn't have fine enough breadcrumbs and the gnocchi fell apart.

Once the breadcrumbs are fine enough, drop the stinging nettles in to the food processor - this results in a bright green mass of breadcrumbs


Add the nutmeg, salt and pepper and then bind the whole lot together with egg to form a nice dough.


Pinch off bits of the dough and roll into marble sized balls, and place on a floured board.


Once you have made all the dough into gnocchi  you can drop them into rapidly boiling salted water then drain them once they have all risen to the top of the water

At this stage you can drop them into a frying pan with some butter in it and fry briefly, or mix them into a cheese sauce.

Very quick cheese sauce
Carton of double cream
Whatever cheese you like
Seasoning
Bay leaf

Put the cream and bay leaf into a pan and bring to a slow boil with stirring. Remove the bay leaf and add in the grated cheese (I used a mix of emmental and mature cheddar - about 100g in total), and stir and heat very gently until you have a smooth and creamy sauce, season and the pour all over the gnocchi.


Serve with a garden salad and vegetables.  Its not possible to tell this is made of stinging nettles - but the bright green colour they impart makes this perfect for kids: 'alien bogies in sauce' - even our 5 year old ate all of his knowing it was made with stingies!

Sunday, 14 April 2013

Lemon yellow butterflies and lemon cake

Spring has finally arrived - heralded by the arrival of the brightest of yellow butterflies, the Brimstone Butterfly. I saw these while out walking the dogs at the Seven Fields Nature reserve and then spotted my first bumblebee of the year too.

Having spent yesterday plumbing in water butts and glazing the small greenhouse, this meant today was the day for cooking rather than gardening.  And, inspired by the dancing yellow flutterbys and the sun, it had to be a lemon cake.

We had some limited edition Yeo Valley Lemon and Poppy Seed Yoghurt in the fridge so I decided to use that in the cake to help it stay really moist - the best lemon cakes are always a bit squidgy.  But I couldn't find a lemon cake recipe anywhere, only one with ricotta cheese in it, so decided to make it up.  I'd put in an extra egg next time to hold it together better, but other than that I think the recipe works perfectly.


I mixed 8oz light brown sugar with 4oz margarine and then added 6oz of the lemon and poppy seed yoghurt. I then added the zest of 2 lemons and the juice of 1 1/2 of those lemons (the juice of the other half lemon is used later in the recipe). At this stage it looks a bit like the mixture had curdled - I think this is the effect of the lemon - best just to ignore it and carry on.  I then mixed in 8oz flour and a teaspoon of baking powder, half a teaspoon of salt, and finally two eggs. After mixing this all up thoroughly I cooked it for about half an hour at gas 5.

Leave the cake halves to cool. I then mixed up some of the yoghurt with icing sugar until it was the consistency of double cream and used that to sandwich the cake together. Mix the juice from the remaining half of the lemon with some icing sugar, until its the consistency of double cream, then pour that all over the cake

I slightly undercooked the cake - still getting to grips with the new oven - and this meant it was really oozey and gooey - lovely!

In case you want to attract lemon yellow butterflies into your garden, the butterflies sip nectar from teasel, knapweed and buddleia.  You can also help out all bees and butterflies by planting lots of wildflowers in your garden - a really easy way to do this is with seedballs which you liberally scatter about whever you want wildflowers.

Sunday, 31 March 2013

All paths lead to... the greenhouse

As the sun is so rare at the moment, I spent as much of the day out in the veg garden as possible to make the most of it - I thought this weekend was supposed to be cold and wet so the warm sun all day has been an unexpected bonus (however wallpaper stripping has taken a serious nosedive).

As there are still so many slabs around the garden I decided to use them to make some more paths between beds - really useful when the soil has been so wet and sticky.  I found another 5 slabs winding their way down the garden behind the old pond - and a frog too when I was digging them up.  I put them down to finish the main path  running from the entrance to the veg garden up to the greenhouse and then started on another path between beds 1 and 2.

Plan of the kitchen garden (not everything is in place yet but this is where it is planned for now)

I laid all of the path between beds 1 and 2 with broken slabs thinking there were no more intact ones -  and did it properly with sand and mixed hardcore that had been left lying around in the garden so its fairly level and stable compared to some of the other paths put down so far.  While clearing soil off a carpet under where bed 5 is due to go I discovered yet another buried path. This was after yesterday's discovery of a path under bed 3 which was jarringly painful when I enthusiastically plunged the fork into it and it stopped dead. Anyway, this most recent path is made up of two very large slabs running perpendicular to the greenhouse and on top of them some more running parallel to the greenhouse. We've already moved about 6 slabs from this area to make the path on the north side of bed 3. Its all a bit like an archaeological dig; digging down through the layers to find older and older paths underneath - I think that this might have been the bottom-most path though.
The new path between beds 1 and 2

While there is an ever increasing pile of rubbish forming in one place in the garden - all along where bed 4 will be eventually (and I stand here to take all the photos so no-one can see it!) - the garden is now starting to look a lot clearer in other places and I've managed to clear a lot of the dumped rubbish from bed 1. Underneath the apple tree in bed 1 is another of the strange mounds of soil that are abundant in the garden. I'm not sure where in the garden it has come from, or why, but as it is all on top of an old cream carpet, it has clearly been put there on purpose. Having found no body under it as I excavated I've started to redistribute it elsewhere - bed 1 is starting to look more level, and the remainder of the soil will eventually move to the bed 5 area. Because of the carpet this soil was on, the bottom of the mound is very clay-ey and filled with some of the biggest worms I've ever seen - the soil at the top of the mound however is lovely and crumbly.

There are a number of plants around the garden (and in the soil mounds) that I am fairly certain are Aquilegia -  I'm really happy about this as I love these flowers and had loads self-seeding in the old garden, but  when we moved I wasn't able to find and dig them out and bring them like I did with the comfrey, meadow cranesbill, oregano, mint, lemon balm, thyme and Monkey puzzle tree.  I've moved these aquilegia plants to bed 1 as some are clearly very happy growing under the apple tree already - apparently they like dappled shade as well as full sun.

Finally, I sprinkled a load of sweet rocket and poppy seeds (collected from the old garden) along the cracked path - this will probably drive me mad in the summer if they germinate well, but it all looks so sterile at the moment and I want to start this garden being as bee-friendly as possible straight away.

Saturday, 30 March 2013

Sunny day in the garden

Yay! the sun came out so I was able to get out in to the garden and feel like I might be making some kind of progress out there. While, it still feels far too cold to be planting a lot of my seeds, I can't bear that the year is getting away from me - especially as the clocks change tonight. Despite the fact that I am sure that anything I plant in two or three weeks time will easily catch up with anything I planted today, I still wanted to feel like I might be on the way to some produce from the garden this summer.

I moved about a tonne of soil from a strange and rather random mound, where the small greenhouse is due to go, over to the raised beds in front of the big greenhouse. There are about four such mounds of soil in various places round the garden - its unclear why they are there or what they came from - but the ground needs to be flattened, and the beds need to be raised.


Into the bed on the left I've planted Sutherland Kale, San Marzano Turnip Broccoli, Touchstone Gold Beetroot, Dragon Purple Carrot, Triple Purple Orach, Red Flowered  Broad Bean and Martock Broad Beans.

I started to put up the pea netting on the bed on the right, and couldn't manage to get the canes into the ground beyond four inches - I found yet another set of paving slabs - what on earth were the previous owners doing? Fortunately there were only four of them and I was able to get them out very quickly.  Once the pea netting was in I planted Purple Podded Peas in the bed. This is a variety that grows to about 2 metres in height and I've had heavy yields in previous years so I've put tall poles in to try to maximise the yield.

I also planted more in the greenhouse - its so large I have a horrible feeling I am getting carried away planting things and won't have enough space in the garden when things have to be moved outside - but I'll deal with that when it arises. I've planted Asparagus Peas, Black Forest and Genovese Courgettes,  Mixed Squash Jaune de Poitou and Bleu de Solaise Leeks, Kailaan Chinese Stem Broccoli  and Giant Prague Celeriac.

Of the things I have planted in the greenhouse so far, only the peas have germinated - I don't blame the rest, its still far too cold for any plant to want to even venture out of the soil. Even the hop has not put up any shoots yet.

When clearing out the small greenhouse (moved from the old house and in the process of being erected) I found quite a few seed packets with a few seeds left over and some home-saved seeds as well. Rather than compost them I thought it would be worth seeing if any of them would germinate - so I've also planted a load of home-saved sunflowers and beans (dwarf, runner and french varieties) from 2011,  and some courgettes (lebanese, de nice, scallop, patty pan, black forest and golden zucchini), and dwarf purple and yellow climbing beans. I doubt any of them will grow but its worth a try - especially as the beans are all good tasting varieties.

Until then however I have to content myself with feeling that I am making progress, so a comparison between the garden when we first got started, and now is in order:
23rd February 2013

30th March 2013


Friday, 29 March 2013

Chilli and Chocolate Brownie Easter Cake

So its really just chocolate brownie...but in cake format with some added chilli! But chocolate brownies are always moister than a standard chocolate cake so it makes sense to make it in cake form, slather it with icing too - and piling on some mini eggs makes it a bit 'Easter-ish'.


200g chocolate
180g margarine
320g brown sugar
120g self raising flour
20g cocoa powder
1tbsp vanilla essence
3 medium size eggs
chilli oil

Melt the chocolate, then add the margarine and continue to heat until it's all melted. 
Mix in the sugar, then add the vanilla essence.
Add the flour and cocoa powder and mix
Add the eggs one at a time until the mixture is glossy and smooth, then add chilli oil to taste (just a slight hint of it is enough)
Put it into two 8inch baking tins
Cook for about 30 minutes at gas mark 3 - don't overcook as the edges go too hard - chocolate brownie is meant to be a bit gooey in the middle.

When the cake has cooled, sandwich the layers together with chocolate icing and then cover the top and side (I used a mix of margarine, cream cheese, icing sugar, cocoa powder and vanilla essence)

Thursday, 28 March 2013

Adventures in cheesemaking (or not)

I'll start by admitting I haven't tried the cheese I made yet - it was sitting on the side in the kitchen in salty water looking at me accusingly waiting to be eaten and I bottled it and disappeared to the conservatory to write about the process of making it instead of being brave and eating it.

This cheesemaking is a result of re-reading Barbara Kingsolver's 'Animal, Vegetable, Miracle' - in it she goes on a cheese making course and makes making mozzarella sound incredibly easy. I'm not so sure but am happy to have a few more practices this weekend (I have some basil and tomatoes ready and waiting)*
 
So, the process; get a gallon of cold milk, add some citric acid and then heat to 90F. I didn't have a gallon of milk - in any case it was an american gallon which is different from a UK gallon (apparently this was due to the shipping of whisky to the New World when it was first settled by Europeans - the gallons left here one size, and arrived on the other side of the pond somewhat smaller). Fortunately 4 pints of milk is sort of equivalent to two-thirds of an American gallon so I adjusted somewhat and carried on. I liberally added some citric acid (aka lemon juice - which is NOT recommended in some instructions I read) and started heating.
The milk with citric acid in it, and rennet just added
It was at this point I discovered my next problem - my very swish jam-making thermometer didn't in fact go down to 90F - in any case the numbers and graduations at the bottom were a bit washed off.... so it was all very hit and miss from then on

When it reached (an estimated) 90F I added rennet, stirred gently and then left it to sit for 5 minutes. Trouble is I forgot to turn the gas off so the temperature continued to rise. This was equivalent to doing a form of ultra high heat pasteurisation which may explain the non-mozzarella like consistency I ended up with finally - but I didn't realise that at this stage.

Formation of the curds is very apparent when cut up with a knife
What did happen though was a formation of curds as they separated from the whey - and it was of the right consistency as described in the instructions so I carried on blithely. After they have formed you cut them with a knife into 1 inch square chunks. You then begin to heat it all again to 105F.

Heating the curds and whey up to 105F and stirring - curds sinking to the bottom as more whey 'leaves' them
I did have 105F marked on the thermometer so felt I was getting back on track nicely. Trouble is the instructions said to stir gently - I did so and it seemed to break the curds up even more - in the picture accompanying the instructions though there appears to be no disturbance of the curds through stirring (is it better to follow written or pictoral instructions?)

I then put the curds into a colander using a slotted spoon - I got very excited at this stage as some of the curds seemed to pull and stretch just like the mozzarella instruction photos showed (but they were about 5 steps further along after numerous heatings in the microwave). I wish I had followed instict at that stage and not heated as much as the instructions said. But the aim is  to get the curds up to about 135F by heating for short bursts in the microwave and kneading between heatings to start it all stetching nicely.

I think I overdid it in the microwave (other distractions meant I wasn't properly paying attention and taking it out soon enough). I did lots of kneading and stretching but it had gone a little bit granular and not at all stretchy by this stage - signs of over-heating?

The finished product - it looks pretty much like mozzarella but not at all shiny on the outside. Sitting in salted water to improve flavour
However, I did finally manage to form it into a ball. Its not very shiny which the outer surface should be, and it certainly doesn't stretch in the way it is meant to - but I will eat it and see what it is like - and see whether it should even be called cheese?.  I will also try again over the weekend and see if instead of heating it in the microwave I can do it in boiling water which is the proper way - but painful!

The dogs loved drinking the whey although I kept a bit of that as I saw somewhere that you can make ricotta cheese using it - but I will try to get the mozzarella working properly first before I try anything else (but I feel goat milk and other cheesy variations calling already)

LUNCHTIME:
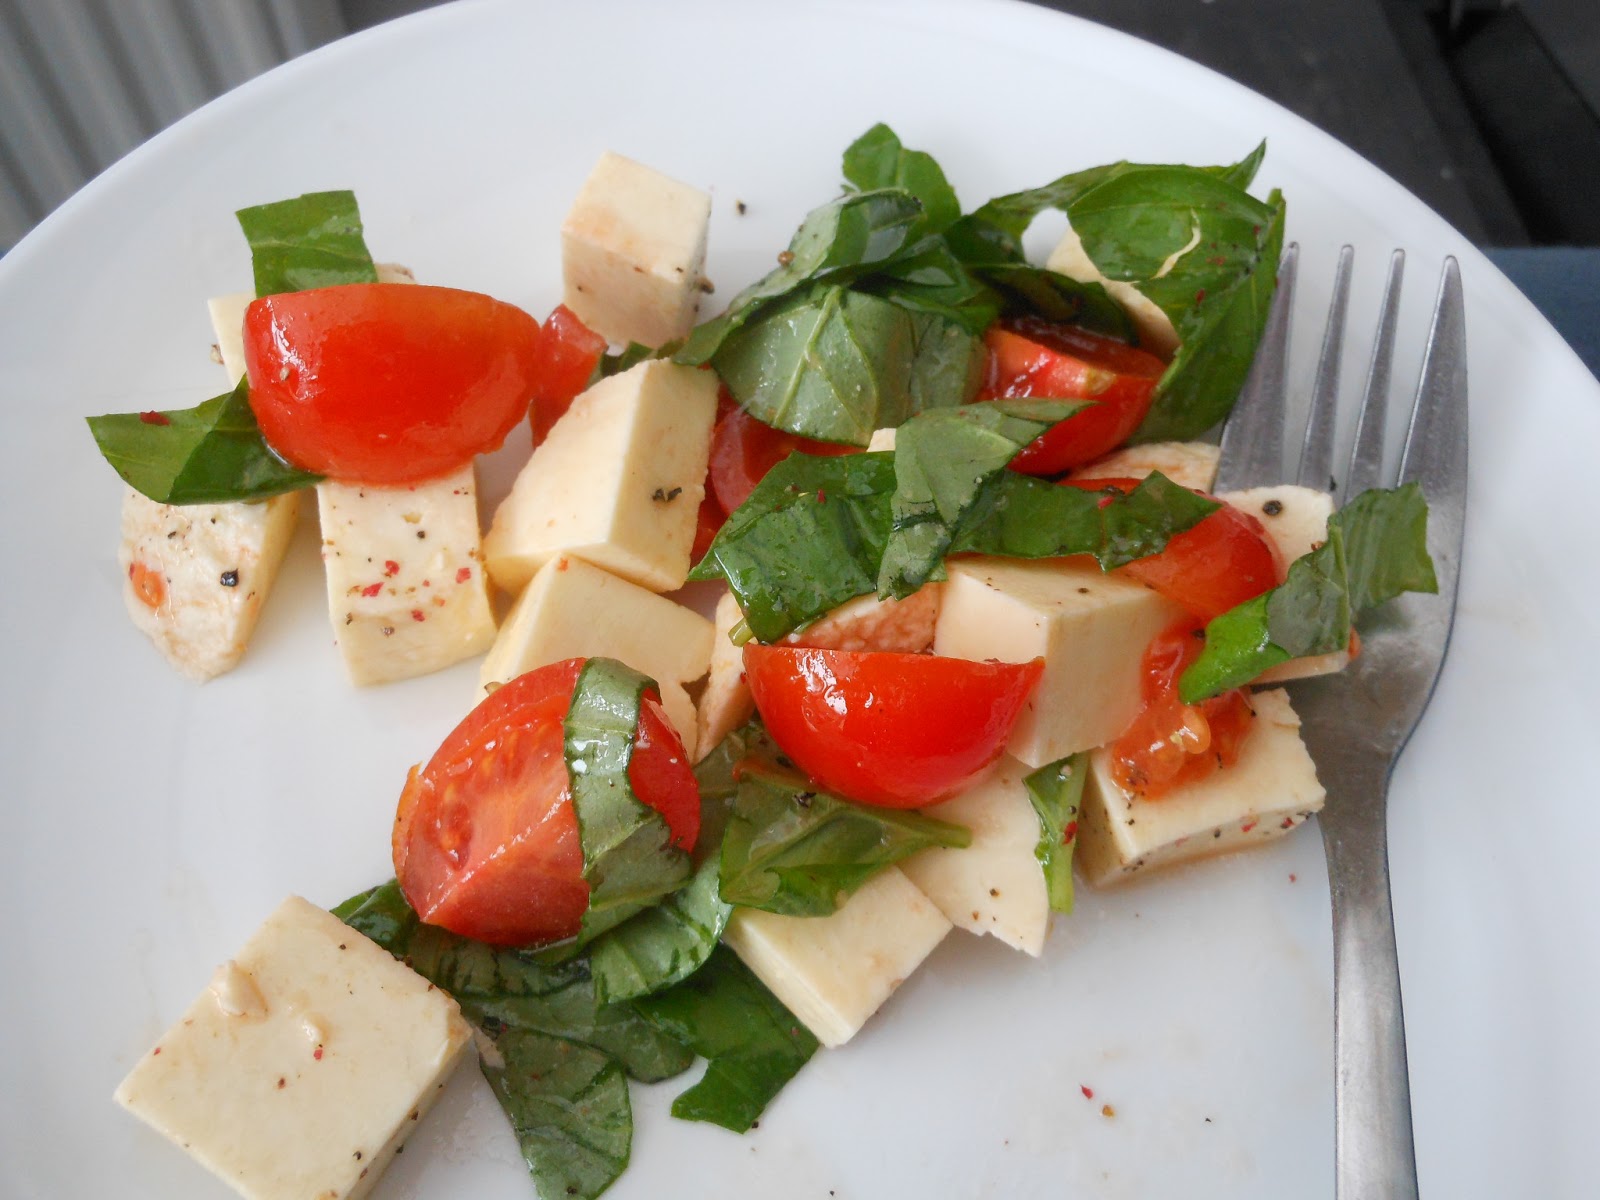
Basil, Mozzarella and Tomato salad
Taste good - but the texture is totally wrong; slightly granular and no stretch at all!

* The irony of this comment about tomatoes will not be wasted on anyone who has read the book - having tomatoes in March is exactly what the book is not about - it focuses on eating seasonal food that has been produced locally. While the tomatoes I have are from a local veg box scheme, the plants must have been heated to get them to produce fruit this early in the season so not very seasonal at all.